Upload to Client Portal
You can upload returns to Client Portal so your customers can review their returns. In order for Client Portal to automatically send portal invitation e-mails to your clients, an e-mail address must be present in the tax return on the Filers Info page and the Automatically Send Client Portal invitation emails preference must be enabled on the Return Manager Preferences tab.
Review the following scenarios before uploading returns to Client Portal:
Scenario 1: When a contact does not exist in CCH iFirm
When a contact does not exist in CCH iFirm, the contact and portal are created for you when uploading returns to Client Portal. When an e-mail address is present on the Filers Info page in ATX and the Automatically Send Client Portal invitation e-mails check box is enabled on the Return Manager Preferences tab, Client Portal automatically sends an invitation e-mail when the PDF is uploaded to Client Portal. If no e-mail address is present on the Filers Info page in ATX, you will need to add an e-mail address for the contact in order to send an e-mail invite. See Invite people to a portal and manage invitations.
Scenario 2: When the contact exist in CCH iFirm
When the contact does exist in CCH iFirm, the portal will be created for you when printing the return to Client Portal. When an e-mail address is present on the Filers Info page in ATX and the Automatically Send Client Portal invitation e-mails check box is enabled on the Return Manager Preferences tab, Client Portal automatically sends an invitation e-mail when the PDF is uploaded to Client Portal.
Scenario 3: When the contact and portal exist in CCH iFirm
When the contact and portal exist in CCH iFirm and the Automatically Send Client Portal invitation e-mails check box is enabled on the Return Manager Preferences tab, Client Portal automatically sends an invitation e-mail when the PDF is uploaded to Client Portal.
To upload returns to Client Portal:
- Open the return.
- Do one of the following:
- Click the Print toolbar button.
- From the Returns menu, select Print Return.
- Press Ctrl+P.

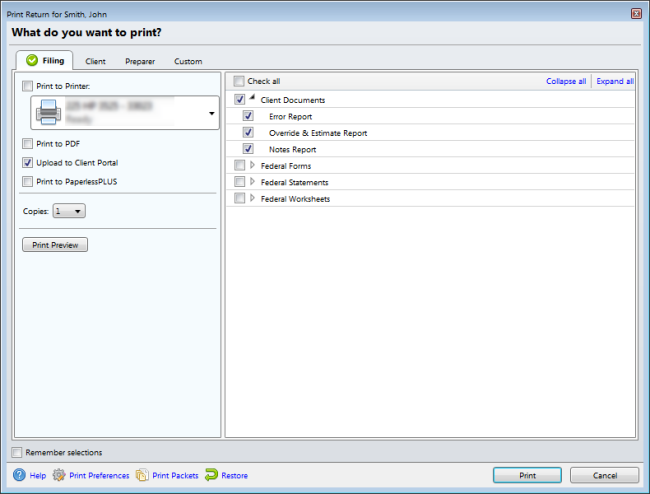
Print Return dialog box (Upload to Client Portal check box option)
- Select the copies you wish to print in the tree.
- Check the Upload to Client Portal check box (either instead of or in addition to any other Print selections).
- Click Print, and ATX uploads the document to the client's portal.
You can set up your Print Packets to always upload specific copies to Client Portal.