Workstation and Server Installation
This topic provides instruction links for the Workstation and Server selection during the installation routine.
To install Payroll on this machine so it can be used as both an active workstation and as the network server:
- Do one of the following:
- Install from DVD: Insert the DVD provided in your product shipment into the DVD-ROM drive. Refer to If Payroll DVD Doesn't Start Automatically if necessary.
- Download from Web: Payroll can be downloaded from the MyATX Solution Center. See Downloading Payroll.

Installation: Welcome
- Click Next.

Installation: License Agreement
- Click the I accept the terms in the license agreement radio button to indicate that you have read and agree to the terms of the license agreement; then, click Next.

About the Installation Process
- Click Next.

Installation: Select Your Install Type
- Select the Network option.

Installation: Select Your Install Type (Network)
- Click Workstation and Server.

Installation: Confirm Your Install Type
- Click Install.

Installation Complete
- Click Finish.
This completes the Payroll installation process. The Payroll icon is placed on your desktop.
If you receive a message that your network setup is not complete, click the Help link for Network Troubleshooting Tips.
Network Server and Workstation Activation
- Double-click the Payroll icon.
The Activation Codes Dialog Box appears the first time you start the application after installation.

Activation Codes
- Enter the product Activation Code from your Fulfillment Confirmation Slip.
- Click Activate. The product name appears in the Activated Products pane.
- Payroll opens to the Welcome To Payroll dialog box.

- The User Name field defaults to Admin. You must first establish a password for the Admin user in order to access Payroll.
Passwords must follow these guidelines:
- 8 - 64 characters
- Spaces are allowed
- (Optional) Select the Remember me check box to have your User Name automatically populated when you launch the application from this workstation.
- Click Login.
- Open your authenticator app to setup multi-factor authentication.
- Scan the QR code provided on-screen.
The second factor backup code displayed at the bottom of the dialog must be copied and saved in order to recover your account.
The second factor backup code is case-sensitive.
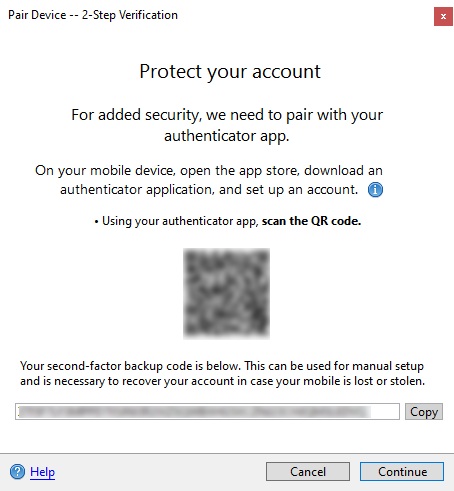
Pair Device - 2-Step Verification
- Click Continue.
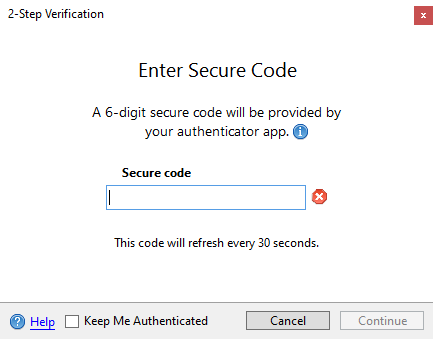
2-Step Verification
- Enter the 6-digit secure code displayed in your authenticator app for Payroll 2024 on [Machine Name] where Machine Name is the name of your computer. Some authenticator apps may also display the application user name.
- Click Continue.
- In the Download Form Updates dialog box, click the Adjust form update settings link.

Download Form Updates

Updates Preferences
- Select the check box(es) next to the package(s) you frequently work with under the Form Updates area of the dialog box.
- Scroll down to the section with the state check boxes; then, select the state(s) you want to include in your form updates.
- Click Apply, then click OK.
- In the Download Form Updates dialog box, click Continue.
- When the Update Results dialog box appears, indicating that the download was successful, click Close.
Next step: Perform Workstation Only installations and activate Payroll on other computers on the network. See Network Workstations Installation.
IMPORTANT! Network users will be required to sign in to use the Payroll program. The Admin user must setup users in Security Manager in order for users to acquire their User Names.